If your Nissan Pathfinder’s brake lights aren’t working properly, it can be more than just annoying—it’s a safety risk. The culprit is often the brake light switch, a small but vital part that tells your brake lights when to turn on.
The good news? Changing this switch is something you can do yourself, even if you’re not a car expert. In this guide, you’ll learn exactly how to replace the brake light switch step-by-step, saving you time and money. Ready to fix your brake lights and get back on the road safely?
Let’s dive in.

Credit: yourpghlawyer.com
Tools And Materials Needed
Before starting to change the brake light switch on your Nissan Pathfinder, gather all the tools and materials needed. Having the right tools makes the job easier and safer. It helps you finish the work faster and avoids damage to your vehicle.
Prepare a clean workspace with good lighting. Keep everything close to avoid interruptions. Check each tool and part before beginning the repair to ensure you have what you need.
Basic Tools Required
You will need a set of screwdrivers. A flathead and a Phillips screwdriver are essential. These help remove panels or covers around the brake light switch.
A ratchet and socket set is also necessary. The sizes 10mm and 12mm often fit the switch bolts. These tools help loosen and tighten parts securely.
Replacement Parts
Get a new brake light switch designed for Nissan Pathfinder. Using the correct part guarantees proper fit and function. Avoid cheap or generic switches that may cause problems.
Additional Materials
Keep a flashlight or work light handy for better visibility. Gloves protect your hands from dirt and sharp edges. A small container helps hold screws and bolts so they don’t get lost.
Locating The Brake Light Switch
Locating the brake light switch on a Nissan Pathfinder is the first step to fixing brake light issues. This small part controls the brake lights, turning them on when you press the brake pedal. Knowing where it is helps you check or replace it easily.
The brake light switch is usually near the brake pedal inside the car. It connects to the pedal arm and the wiring harness. Finding it requires looking under the dashboard, near the top of the pedal.
Check Under The Dashboard
Sit in the driver’s seat and look beneath the dashboard. The brake light switch is attached to the brake pedal assembly. It is often a small, rectangular device with a wiring plug.
Locate The Brake Pedal Arm
Follow the brake pedal arm upward. The switch is mounted where the pedal arm moves. It activates when the pedal presses against it.
Identify The Wiring Connector
Spot the wiring connector plugged into the switch. This connector sends the signal to the brake lights. It usually has one or two wires and clicks into the switch securely.
Preparing Your Vehicle
Preparing your Nissan Pathfinder before changing the brake light switch is important. This step helps avoid accidents and makes the job easier. Take time to get the vehicle ready. A well-prepared vehicle ensures a smooth repair process.
Follow simple steps to prepare your car safely. These steps protect you and your vehicle parts. Proper preparation can save time and prevent damage.
Ensure Safety Precautions
Start by parking your Pathfinder on a flat surface. Turn off the engine and remove the key. Set the parking brake to keep the vehicle still. Wear gloves to protect your hands. Use safety glasses to shield your eyes. Avoid loose clothing that may catch on parts. Keep tools organized and within reach. These safety steps reduce risks during the repair.
Accessing The Brake Pedal Area
Locate the brake pedal inside the driver’s side footwell. Clear any floor mats that may block access. Use a flashlight if the area is dark. Remove any panels or covers around the brake pedal. This may require a screwdriver or socket wrench. Be gentle to avoid breaking clips or plastic parts. Access to the brake light switch is behind the pedal. Proper access helps you work quickly and carefully.

Credit: www.youtube.com
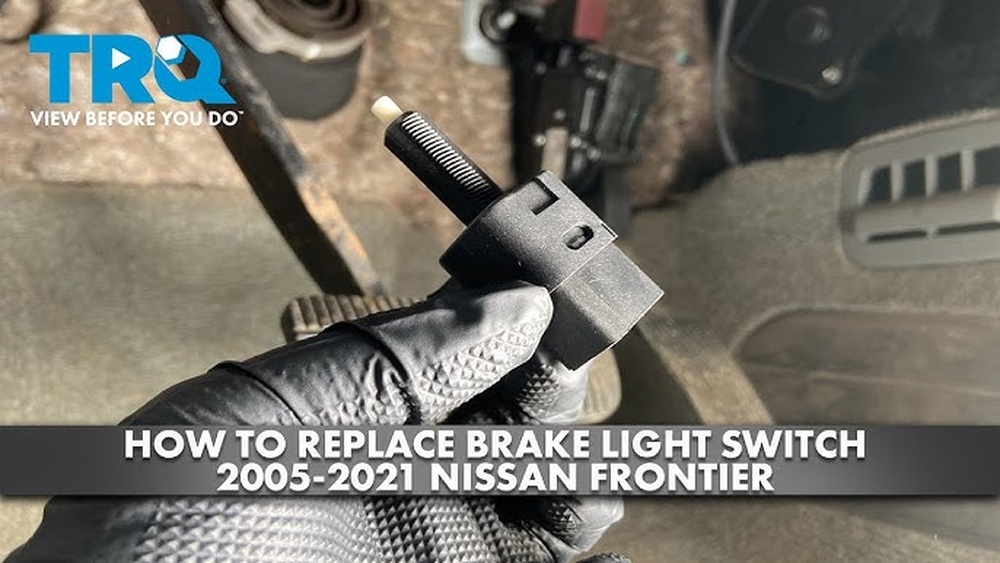
Removing The Old Brake Light Switch
Removing the old brake light switch on a Nissan Pathfinder is the first step in the replacement process. This task needs care and attention to avoid damage. The brake light switch is located near the brake pedal. It controls the brake lights, signaling other drivers when you slow down or stop.
Before installing a new switch, you must disconnect the electrical connector and detach the switch from the pedal assembly. These steps are simple but important for safety and proper function.
Disconnecting The Electrical Connector
Start by locating the electrical connector attached to the brake light switch. It usually has a clip or tab to hold it in place. Press the tab gently to release the connector. Pull the connector straight out, away from the switch. Avoid pulling on the wires to prevent damage. Keep the connector aside safely for reuse.
Detaching The Switch From The Pedal Assembly
Next, focus on the brake light switch itself. The switch is mounted on the brake pedal assembly. Look for a small clip or screw holding the switch. Use your fingers or a screwdriver to remove the clip or loosen the screw. Carefully slide or pull the switch away from the pedal. Some switches may twist off, so check for this movement. Keep the old switch for comparison if needed.
Installing The New Brake Light Switch
Installing the new brake light switch in your Nissan Pathfinder is a straightforward task. This step is crucial to ensure your brake lights work properly. Follow the steps carefully to position and connect the switch correctly.
Positioning The New Switch
Start by locating the brake pedal arm where the switch fits. Align the new switch with the mounting bracket. Slide it into place gently but firmly. Make sure the switch plunger presses against the pedal arm. This action triggers the brake lights when you press the pedal. Check the switch position twice for correct alignment. A misaligned switch may cause brake light issues.
Reconnecting The Electrical Connector
Next, take the electrical connector and attach it to the new switch. Push the connector until it clicks, showing a secure fit. Check the wiring for any damage before connecting. Proper connection ensures the brake lights receive power. Avoid loose or corroded connections to prevent failures. Once connected, test the brake lights by pressing the pedal. Confirm the lights turn on and off smoothly.

Credit: myfuse.education
Testing The Brake Light Switch
Testing the brake light switch is a key step in fixing brake light issues on your Nissan Pathfinder. This switch tells your brake lights when to turn on. Checking it ensures your brake lights work correctly for safety on the road.
Checking Brake Lights Functionality
Start by turning the ignition on without starting the engine. Press the brake pedal and watch the brake lights at the back of the vehicle. Ask someone to help or use a reflective surface to see the lights yourself. If the brake lights do not turn on, the switch may be faulty or misaligned.
Adjusting The Switch If Necessary
Locate the brake light switch near the brake pedal. Loosen the mounting nut slightly to allow movement. Adjust the switch so it activates when the brake pedal is pressed lightly. Tighten the nut once the switch clicks on and off correctly. Test the brake lights again to confirm the fix.
Troubleshooting Common Issues
Troubleshooting common issues with the brake light switch on a Nissan Pathfinder helps keep you safe. The brake light switch controls the lights when you press the brake pedal. Problems can cause the lights to stop working or stay on.
Understanding these issues helps you fix them quickly. This section covers two common problems: brake lights not turning on and brake lights staying on.
Brake Lights Not Turning On
Brake lights that do not turn on can cause accidents. First, check the brake light switch for damage or wear. The switch may be loose or disconnected from the brake pedal. Make sure the wiring is not broken or corroded. Test the switch with a multimeter to see if it works. Replace the switch if it fails the test. Also, check the brake light bulbs for burnout. Fixing these points often restores brake light function.
Brake Lights Staying On
Brake lights that stay on drain the battery and confuse drivers. This issue usually means the brake light switch is stuck or damaged. The brake pedal may not return fully to its resting position. Inspect the switch and pedal for any blockage or misalignment. Clean or adjust the switch to allow proper movement. Electrical faults like short circuits can also cause this problem. Inspect wiring for damage and fix any faults found. Replacing a faulty switch often stops the brake lights from staying on.
Maintenance Tips For Brake Light Switch
The brake light switch is a small part but very important for safety. It signals drivers behind you when you press the brake. Keeping it in good shape helps avoid accidents and traffic tickets. Regular care can extend its life and keep your Nissan Pathfinder safe on the road.
Simple checks and cleaning can prevent many problems. Replace the switch if it shows signs of wear. Always use the right parts made for your vehicle. Here are some easy tips to help maintain the brake light switch.
Check Brake Lights Regularly
Look at your brake lights at least once a month. Have a helper press the brake pedal while you watch the lights. Make sure all bulbs light up clearly. Dim or flickering lights mean the switch or bulbs may need fixing.
Clean The Switch Area
Dirt and dust can block the switch. Use a dry cloth to wipe the switch and surrounding parts. Avoid water or sprays that can cause damage. A clean switch works better and lasts longer.
Test The Brake Pedal
Press the brake pedal slowly and release it. The brake lights should turn on and off instantly. If there is a delay or no light, the switch might be faulty. Testing helps catch problems early.
Replace Worn Or Broken Switches
Switches wear out with time. Signs include brake lights that stay on or don’t light up. Buy the correct switch for your Nissan Pathfinder model. Follow instructions carefully or ask a mechanic for help.
Inspect Wiring And Connections
Loose or damaged wires cause brake light failure. Check wires near the switch for breaks or corrosion. Tighten any loose connections. Good wiring keeps the brake light system working well.
Frequently Asked Questions
How Do I Know If My Nissan Pathfinder Brake Light Switch Is Faulty?
A faulty brake light switch causes brake lights to stay off or on. It may also affect cruise control or ABS warning lights. Testing with a multimeter or visual inspection helps identify issues quickly and safely.
What Tools Are Needed To Change The Brake Light Switch?
You will need a screwdriver, pliers, and a replacement brake light switch. A flashlight may help to see under the dashboard. Having basic hand tools ensures a smooth and efficient switch replacement process.
How Long Does It Take To Replace The Brake Light Switch?
Replacing a brake light switch on a Nissan Pathfinder typically takes 15 to 30 minutes. This includes locating the switch, removing the old one, and installing the new switch. It is a simple DIY task for most car owners.
Can I Replace The Brake Light Switch Myself Safely?
Yes, you can safely replace the brake light switch if you follow instructions carefully. Disconnect the battery to avoid electrical shocks. Work in a well-lit area and ensure the vehicle is parked securely.
Conclusion
Changing the brake light switch on your Nissan Pathfinder is simple. Follow the steps carefully and take your time. Doing this helps keep your brakes safe and working well. It also saves money on repairs. Regular checks can stop bigger problems later.
Trust your hands and tools to do the job right. Now, your brake lights will work properly again. Drive safely and enjoy your ride.