Have you ever tried to remove a wall anchor and ended up with a bigger mess than you started with? You’re not alone.
Getting a wall anchor out of your wall can feel tricky, but it doesn’t have to be. Whether you want to fix a small hole, replace the anchor, or just clean up your space, knowing the right steps will save you time and frustration.
You’ll discover simple, effective methods to remove wall anchors without damaging your wall. Keep reading, and you’ll be ready to handle this common home improvement task like a pro.
Credit: www.familyhandyman.com
Identify The Wall Anchor Type
Identifying the type of wall anchor is the first step in removing it safely. Different anchors need different removal methods. Knowing the type helps avoid wall damage and saves time. Below are common wall anchor types and how to spot them.
Plastic Expansion Anchors
Plastic expansion anchors are the most common and easiest to spot. They are made of plastic and have a flared end that grips the drywall. They expand when a screw is inserted. These anchors usually stick out slightly from the wall surface.
Toggle Bolts
Toggle bolts have metal wings that open behind the wall. These wings create a strong hold on hollow walls. The bolt passes through the wall and the wings expand behind it. You can often see the bolt head on the wall surface.
Molly Bolts
Molly bolts are metal anchors that expand inside the wall. They have a sleeve that opens like a flower when tightened. These anchors leave a small metal collar on the wall surface. They are stronger than plastic anchors.
Self-drilling Anchors
Self-drilling anchors are made of metal or plastic. They have sharp threads that cut into drywall without pre-drilling. These anchors look like thick screws with wide threads. They often remain flush with the wall surface.

Credit: www.hgtv.com
Gather Necessary Tools
Removing wall anchors without causing damage can be tricky. Walls can crack or get holes bigger than needed. Careful steps help keep the wall smooth and ready for new anchors or paint. Use gentle methods to avoid extra repairs.
Loosen The Anchor With A Screwdriver
Start by turning a screwdriver into the anchor’s slot. Twist slowly to loosen the anchor from the wall. This helps break the grip without pulling hard. It reduces the risk of wall damage. If the anchor spins freely, try another method.
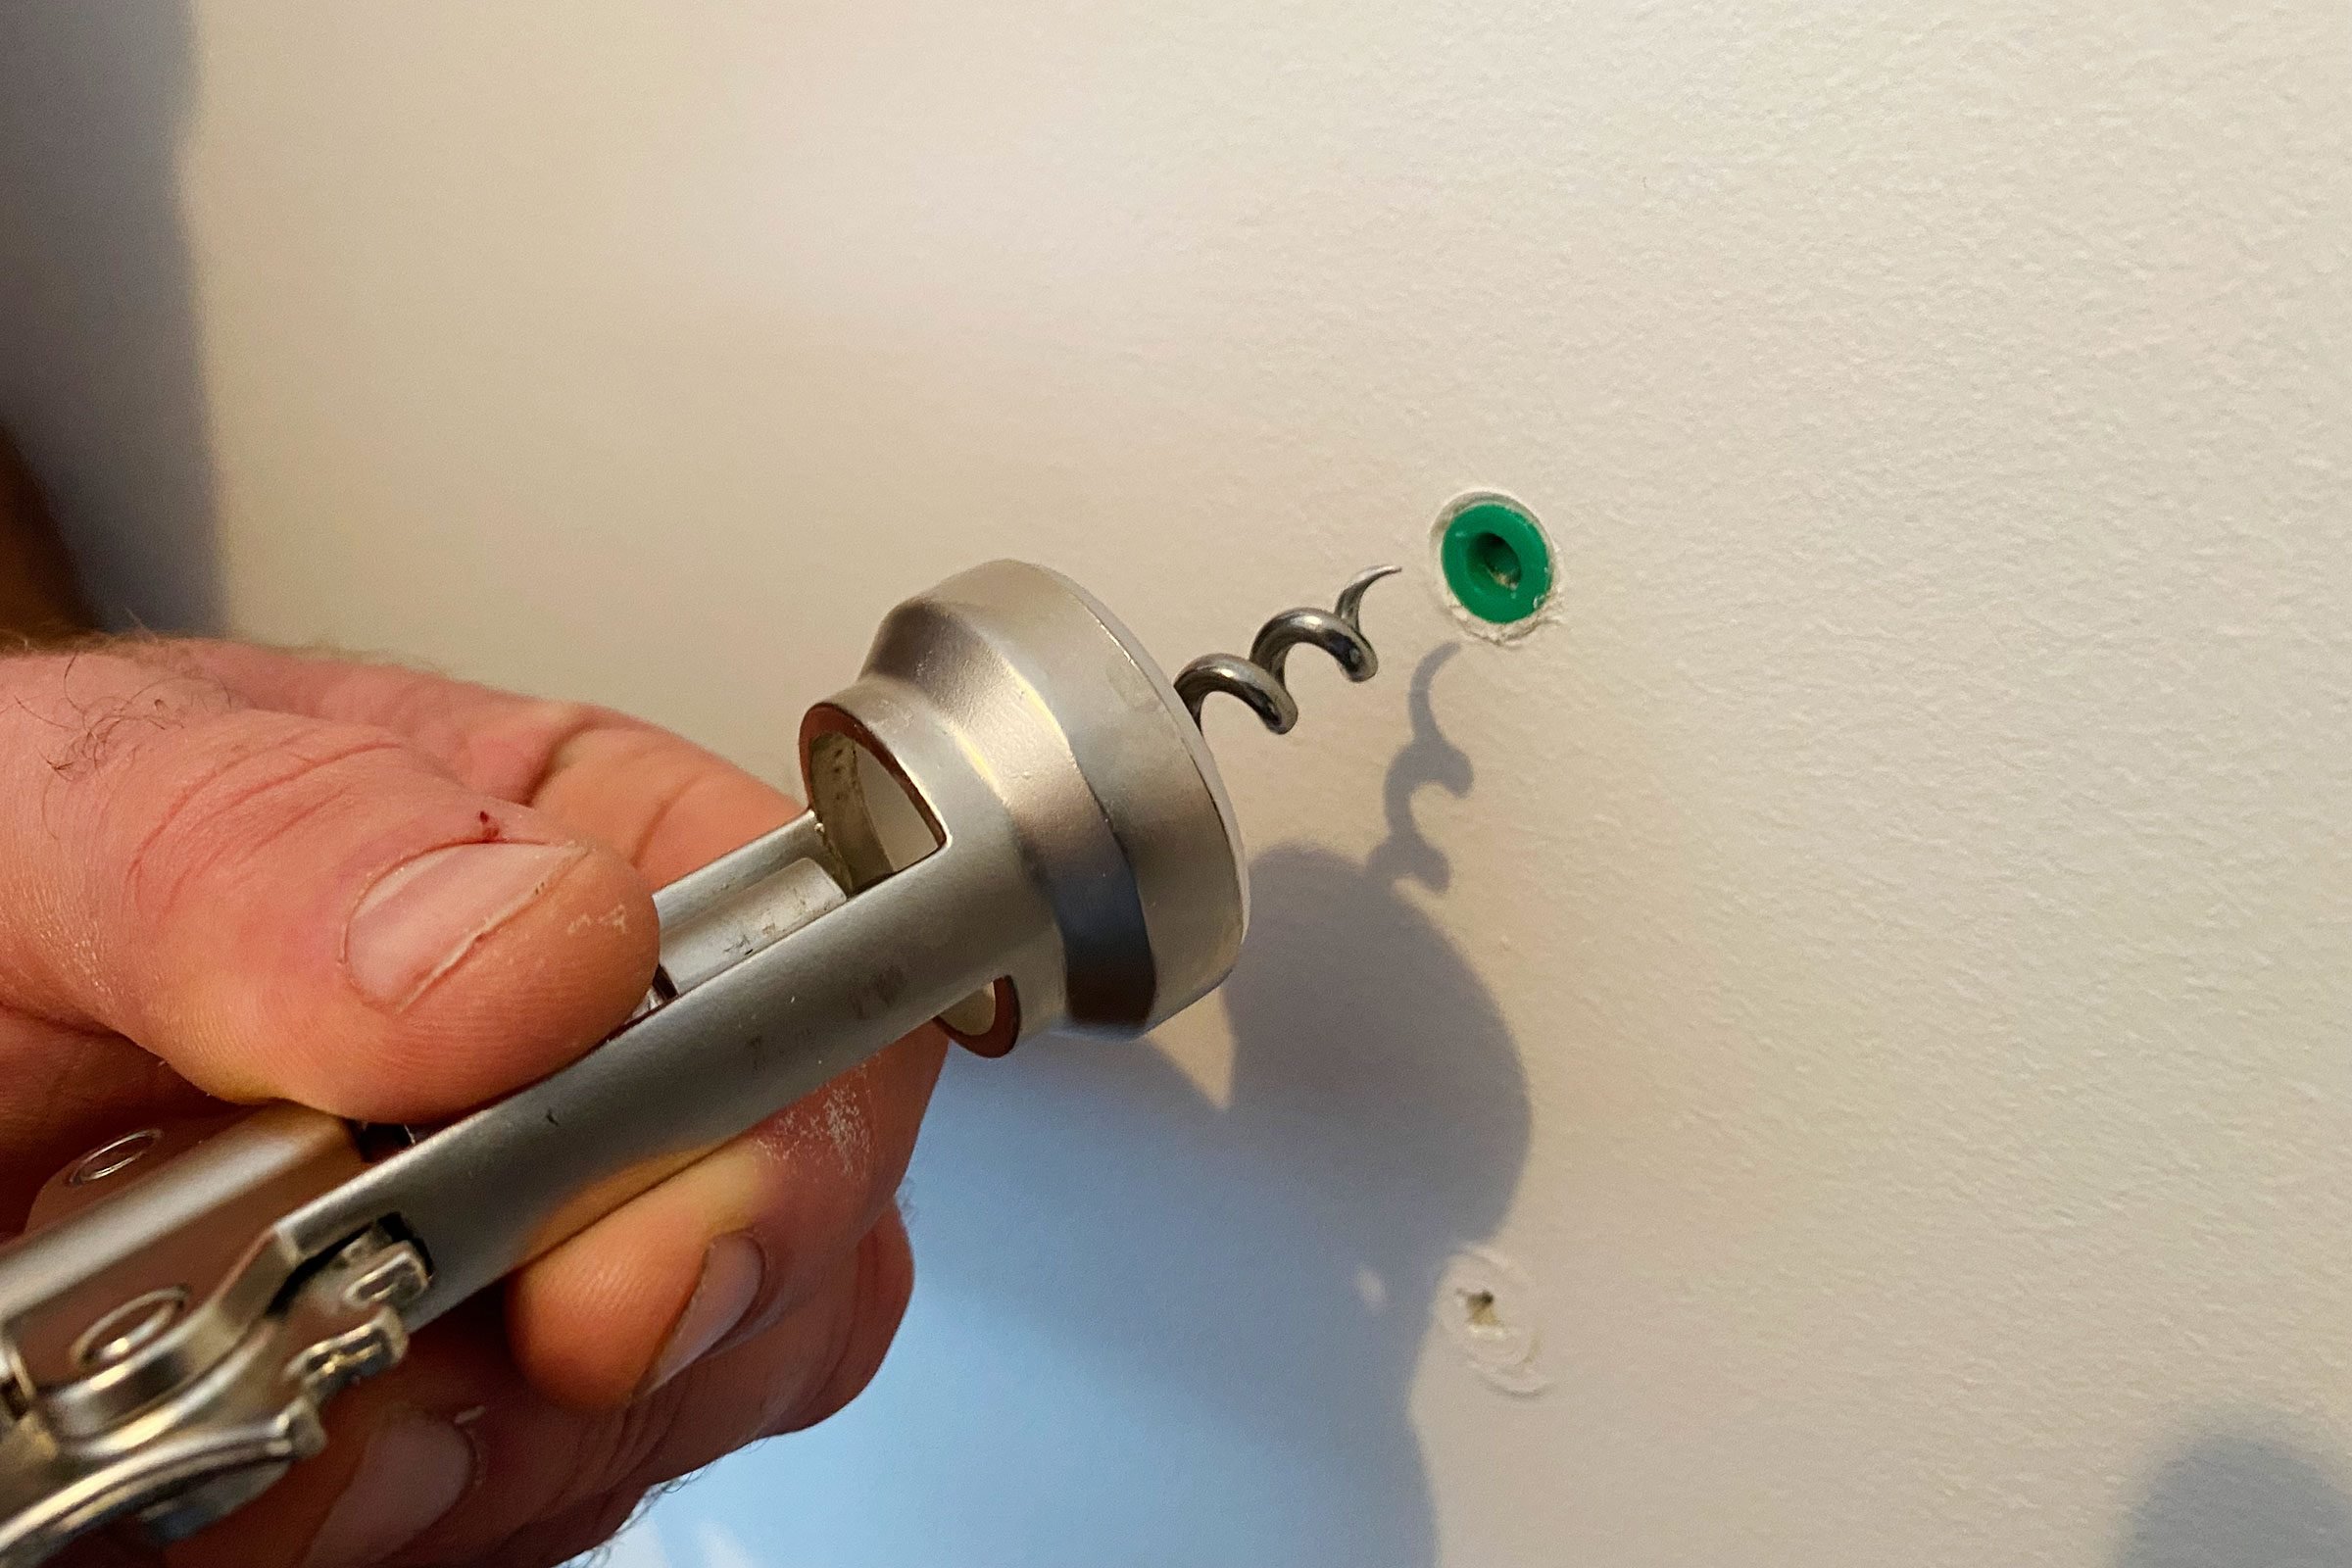
Pull Out Using Pliers
Use needle-nose pliers to grab the anchor firmly. Pull straight out with steady force. Avoid twisting or jerking to keep the wall intact. If the anchor resists, loosen it first with a screwdriver. Pulling gently prevents cracks and holes.
Push Anchors Through The Wall
Push the anchor into the wall cavity using a blunt tool. This works well for plastic or metal anchors. The anchor falls inside the wall and stays hidden. Patch the small hole left behind with filler. This method avoids wall surface damage.
Cutting And Prying Techniques
Cut the anchor flush with a utility knife. Use a small pry bar to lift the anchor piece out. This works for stubborn anchors stuck deep in the wall. Be careful to avoid gouging the drywall. Patch the spot smoothly after removal.
Remove Anchors Without Damage
Removing a wall anchor often leaves holes or damage on the surface. Repairing the wall after anchor removal helps restore a smooth, clean look. Small repairs are simple and quick. Follow these steps to fix your wall and prepare it for painting or decoration.
Filling Small Holes
Use spackling paste or wall filler for small holes. Apply a small amount directly into the hole with a putty knife. Press firmly to fill the hole completely. Remove extra filler around the hole for a neat finish. Let the filler dry according to the instructions on the package.
Sanding And Smoothing
After the filler dries, sand the area gently. Use fine-grit sandpaper for best results. Sand until the wall feels smooth and even. Make sure the patched area blends with the rest of the wall. Wipe away dust with a clean, dry cloth before painting.
Painting And Finishing Touches
Choose paint that matches the wall color. Use a small brush or roller for the patched area. Apply one or two coats for full coverage. Allow the paint to dry completely between coats. The wall should look as good as new after this step.

Credit: www.wikihow.com
Repair Wall After Anchor Removal
Preventing damage to your walls is key when removing wall anchors. Careful steps can save your wall’s surface and structure. Taking time to choose the right tools and methods makes a big difference. The following tips help keep your walls safe and strong.
Choosing The Right Anchor
Select anchors that match your wall type. Drywall anchors suit drywall, while masonry anchors fit brick or concrete. Using the wrong anchor can cause cracks or holes. Choose anchors that hold the weight you need without extra force. This reduces stress on your wall.
Proper Installation Tips
Drill holes carefully and to the correct size. Too big or too small holes weaken the wall. Insert anchors straight and flush with the surface. Avoid over-tightening screws, as this can crack the wall. Take your time for neat and secure installation.
Alternative Mounting Methods
Consider adhesive hooks or strips for light items. These avoid holes and damage altogether. For heavy objects, use mounting brackets or rails that spread weight. This lowers pressure on one spot. Choose methods that fit your wall and the item’s weight.
Frequently Asked Questions
How Do I Safely Remove A Wall Anchor?
To safely remove a wall anchor, first unscrew any attached screws. Then, gently pull or pry the anchor out using pliers or a flathead screwdriver. Be careful not to damage the wall surface during removal.
What Tools Are Needed To Remove Wall Anchors?
Common tools include needle-nose pliers, a flathead screwdriver, a drill, and a utility knife. These help loosen and extract the anchor without harming the wall.
Can I Patch The Hole After Removing A Wall Anchor?
Yes, you can patch the hole using spackle or wall filler. Sand the area smooth once dry, then repaint for a seamless finish.
Why Is Removing Plastic Wall Anchors Difficult?
Plastic anchors expand inside the wall, gripping tightly. This expansion makes removal tricky and may require careful prying or cutting.
Conclusion
Removing a wall anchor does not have to be hard. Use the right tools and take your time. Pull gently or twist the anchor to free it. If needed, patch the hole for a smooth wall. This keeps your wall looking neat and clean.
Practice these steps to feel more confident. Small repairs can save you money and stress. Try these tips next time you remove an anchor. Simple actions make a big difference in home care.